Alright fellow yogi's and cyber friends, are you ready for an awesome DIY?
If you're a yogi, you may have heard about the awesome yoga wheels made by Dharma Yoga Wheel. These wheels are undoubtedly an incredibly useful prop for stretching out your back, shoulders and hip flexors, but they also come at a pretty hefty price - $99! I would LOVE to own one of these wheels, but I just can't justify spending that much money on a wheel at this point in my life. I am a student and paying for college on my own so I just don't have the money to spare. There are other companies like Breakin' a Sweat that make the wheels too, but they are also pretty expensive. So anyway, in most situations like this I end up showing the product to my husband -- because he is so handy -- and we try to figure out a way to make one on our own. Luckily, he had a great idea.
My husband went to our local Allied Supply Company, which is a local company that sells plumbing materials, and bought a 10" PVC coupling. Ten inches is the average size of the wheels sold online, but if you would rather have something smaller, or if you are really tall and want something larger feel free to grab whatever size you want. This coupling was 27 dollars at the store. (Edit* a reader of the blog commented below and shared a website where they will cut a piece of PVC in the diameter of your choice to the exact size you need. The website is below in the comments, 'flexpvc.com.' I have not tried it, but others have had success with it!)

Here are the supplies you will need:
* A 10" diameter coupling (or the size of your choice)
* A Sharpie
* A Tape Measure
* Sawsall or Reciprocating saw
* Glue (Loctite Power Grab Tub Surround or Loctite PL Premium Polyeurethane Construction adhesive)
* An old yoga mat
* An old yoga mat
* A sander
* 150 grit and 1200 grit sandpaper


The first thing you will need to do is pick the width you want your wheel to be. I don't know the exact width of the ones sold online, but I believe they are about 4 or 5 inches. I wanted my wheel to be about 6 inches wide so I measured six inches all the way around the wheel. The more marks you make the better because these will be the marks you will follow around the wheel, so more will help you keep your line as straight as possible.
The next step is to cut the wheel with your saw. The first cut was the hardest because we were using a long blade just to get through the thick material, then we switched to a shorter blade and went all the way around. I'm sorry I don't have any photos of this step, I had to hold the wheel while my husband made the cuts. You will need to use a medium tooth blade, not a fine tooth, and you may find it helpful to use oil while cutting.
Once you are done cutting, get the sander and use the 150 grit sandpaper to smooth any imperfections from cutting the PVC. Then use finer grits of sandpaper to smooth it even more. I did the finer grit by hand.

After you finish sanding you will need to wash the wheel with soap and water and get it as clean as possible before you apply the glue. Then you need to get out your old yoga mat and cut it to fit over the outside of the wheel. Lay the mat out flat and measure and mark it to be wide enough to fit over the wheel with about half an inch or less of the PVC showing on each side. Btw, if you don't have an old yoga mat you can find a pretty cheap one at TJ Maxx, I found some there between 7.99 and 14.99. Another option would be to find a cork mat at your local hobby/art supply store or WalMart and use that instead of yoga mat material.
We experimented with several different types of glue because we ended up finishing the extra PVC that we cut off as another wheel for our daughter. The glue that we used on my wheel was Loctite PL Premium Polyeurethane Construction adhesive. As far as I can tell it worked pretty well, but we applied to glue to the PVC and laid the mat over it so some of the edges of the yoga mat were not completely secured to the wheel. I just took some Contact Cement and brushed it on the edges to secure them. I recommend that you lay your strip of mat out flat and apply the glue to the mat first, then take your wheel and set it on the mat and roll it over the mat until it is all attached. If you get glue in some areas where it shouldn't be it might be a good idea to have a wet towel on hand to wipe it up! On the second wheel we experimented with Loctite Power Grab Tub Surround because it stated that it was made for PVC and plastic surfaces. I think either option will work fine.
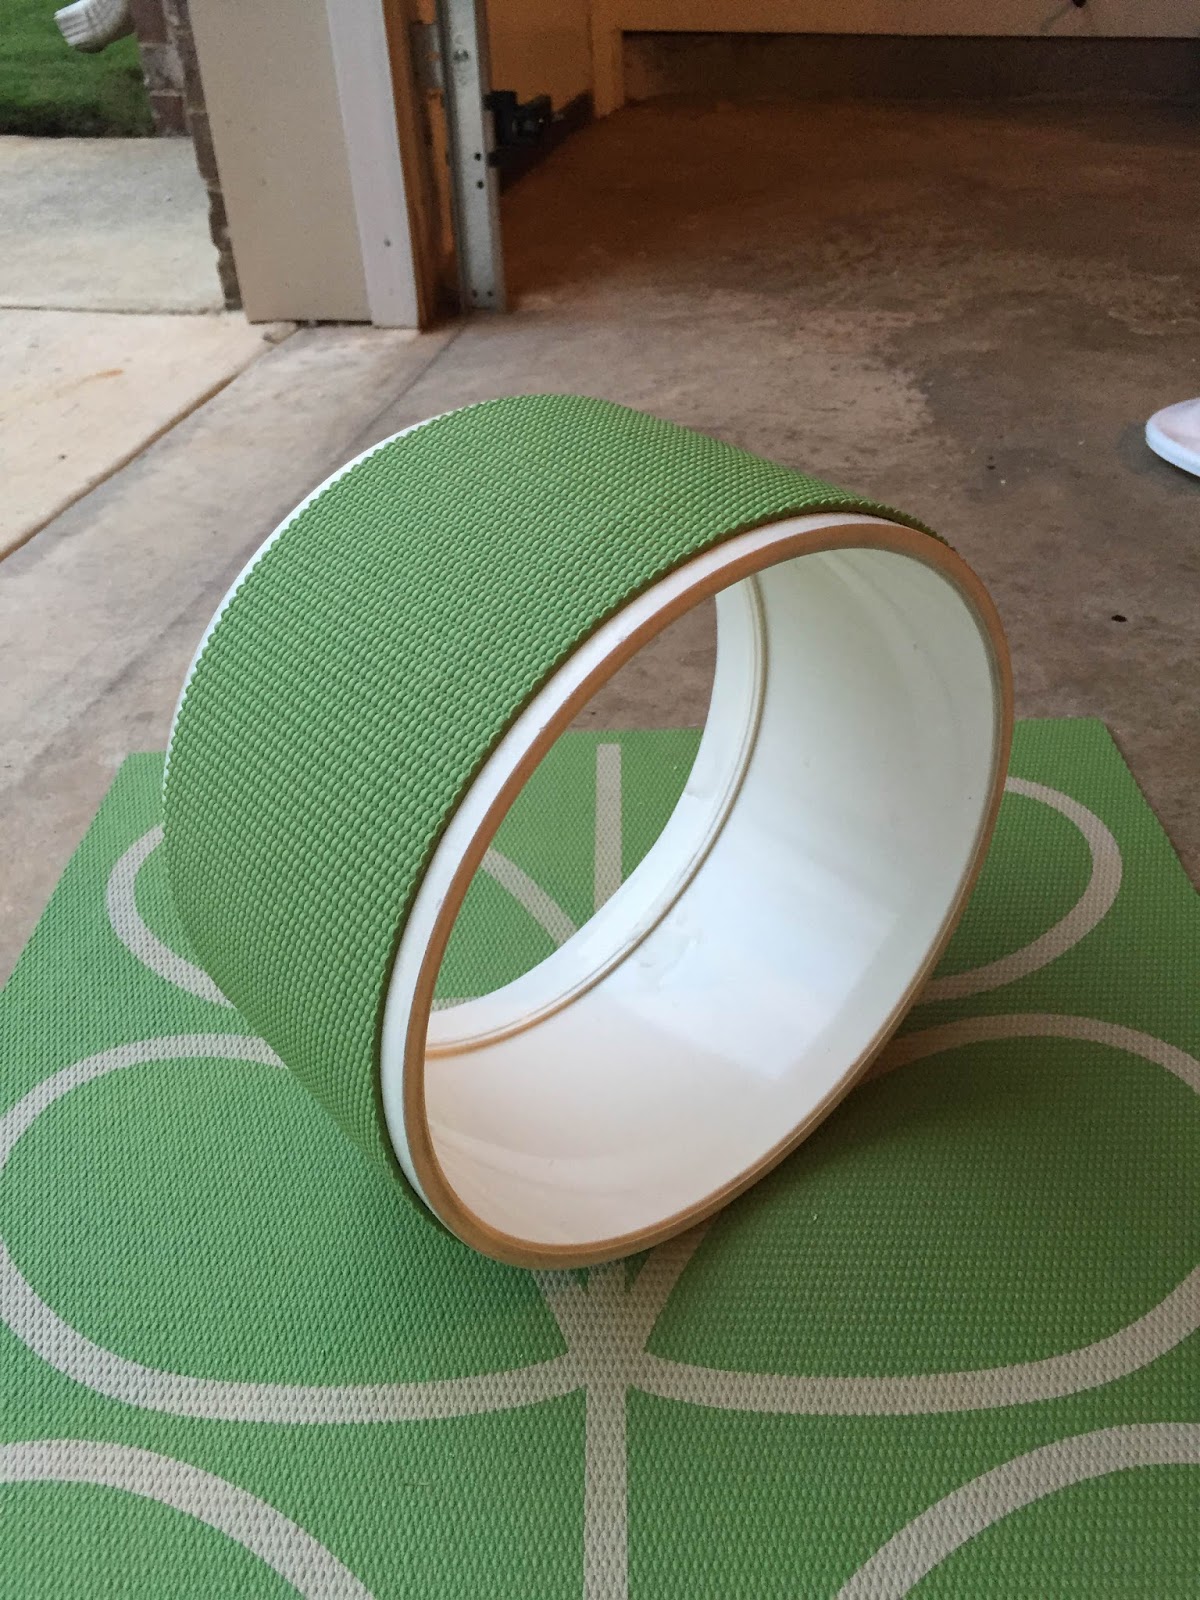
This is how the first wheel turned out! Not bad, right?
But say you really want to add some pizzazz, some color! Well, no problem. On the second wheel that we finished out for our daughter we decided to see how it would look if we painted it.

We used a Rustoleum brand paint that bonds with plastic and has paint and primer in one. She chose blue. There are tons of fun colors and styles you could try though, so feel free to be creative. We even found some glow in the dark paint that would probably be really cool for some Glow Yoga! We also picked a clear coat. We chose one made for cars because I wanted to make sure it would chip as little as possible. Just keep in mind if you do decide to paint there is always a chance of chipping. Also, like I said earlier, we used a different type of glue on this one, Loctite Power Grab Tub Surround.

Here is the second final product!


So there ya have it folks!
I would love to see your creations, so if you attempt this take lots of pictures and share with me! Find me on instagram @urdhva_shaynasana and tag me if you post pictures! Use #DIYyogawheel and #rocketcityyogi also, to help me easily find your photos. I will eventually do another post with photos of all the #DIYsuccess wheels, but I need photos!
If you find anything to make this project easier, feel free to share and if you have questions, feel free to ask!
As a disclaimer, I would like to say that I am not trying to discourage you from buying the Yoga Wheel products that you can find online! I am just showing you an option if you don't have that kind of money or if you just like to make things yourself. I'm sure I will buy one of the wheels myself once I save the money!
Namaste lovelies!
